Payment Setup
If you would like to deliver a payment product with your gift, you will need to define it here. Passthrough is probably the simplest to start with and will just embed your payment information inside the gift, to be revealed when it’s successfully claimd. For an in-depth explanation of how payment mechanisms work, see Payments
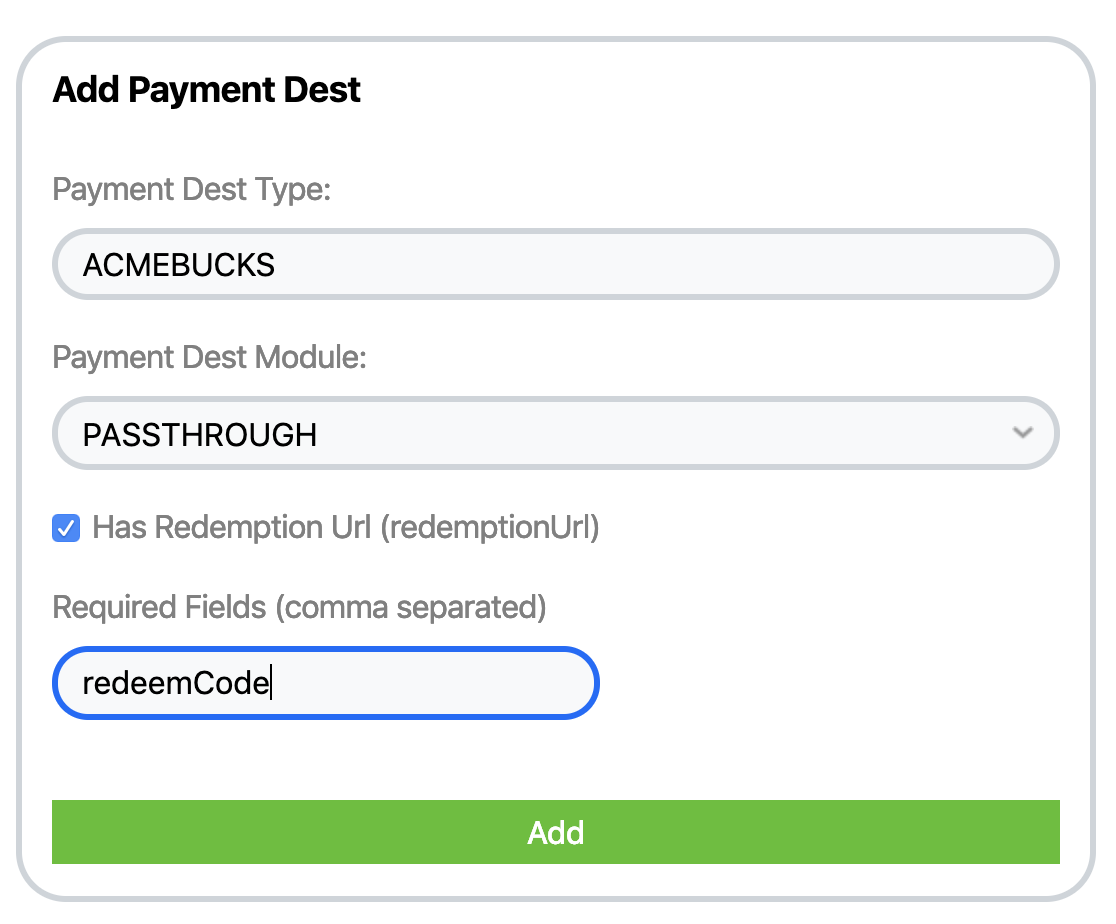
Configuring a Payment Destination
This is the payment product your recipient will receive
- Go to the ‘Add a New Payment Dest’ section
- fill in a Type for your payment, which should uniquely identify the type of payment and consist of only uppercase numbers/letters
- Select an appropriate payment module (see the detailed descriptions Payments)
- If Passthrough:
- the data may have a ‘Redemption Url’, that is a link that the recipient will follow to complete the claim of their payment
- fill in any other fields that will be required to be sent with the payment data. Optional fields not included here are also possible
- a matching ‘payment source’ will automatically be created and configured for you
- If Callback:
- fill in the url for a webhook on your side that will be called to validate the payment when the gift is claimed
- fill in the url for a webhook on your side that will be called to complete the payment when the gift is claimed
- details and example code for what your webhook should look like can be found here (Coming soon…)
- a matching ‘payment source’ will automatically be created for you, but you must configure it below
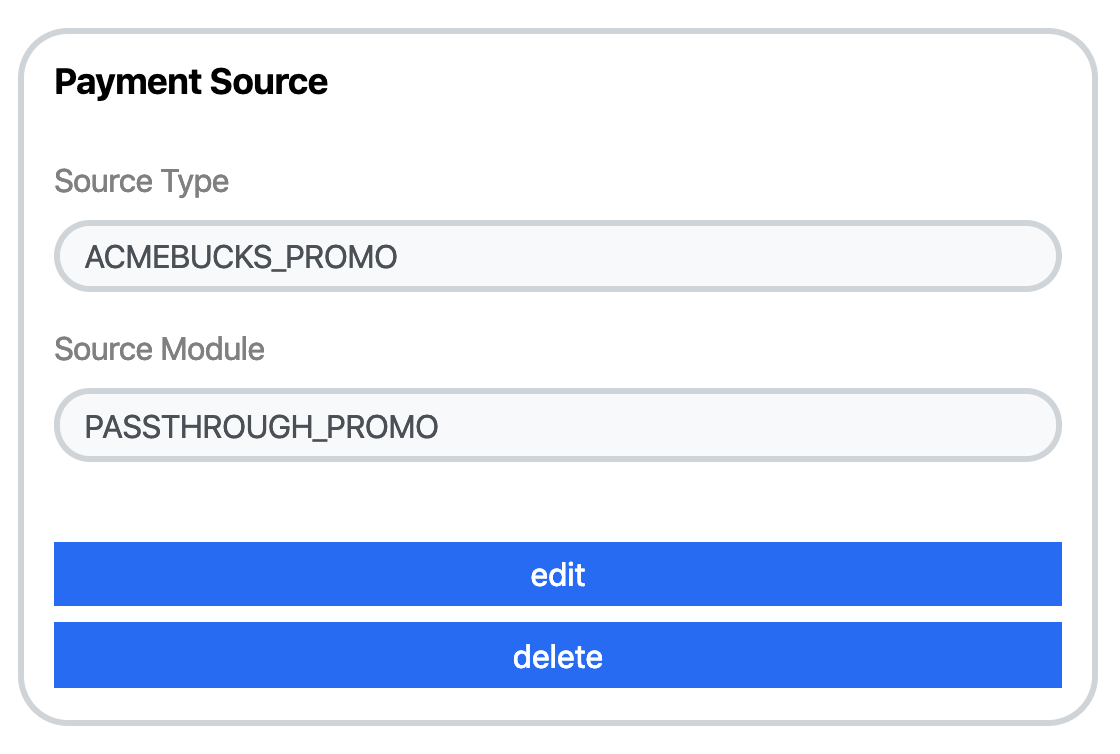
Configuring a Payment Source
This is the funding source for your payment product that will be included by your sending application
- Select an existing Payment Source if one has already been created for you, or ‘Add a New Payment Source’
- Fill in an appropriate type and module (see the detailed descriptions Payments)
- If Callback: * fill in the url for a webhook on your side that will be called to validate the payment when the gift is created * fill in the url for a webhook on your side that will be called to fund the payment when the gift is created
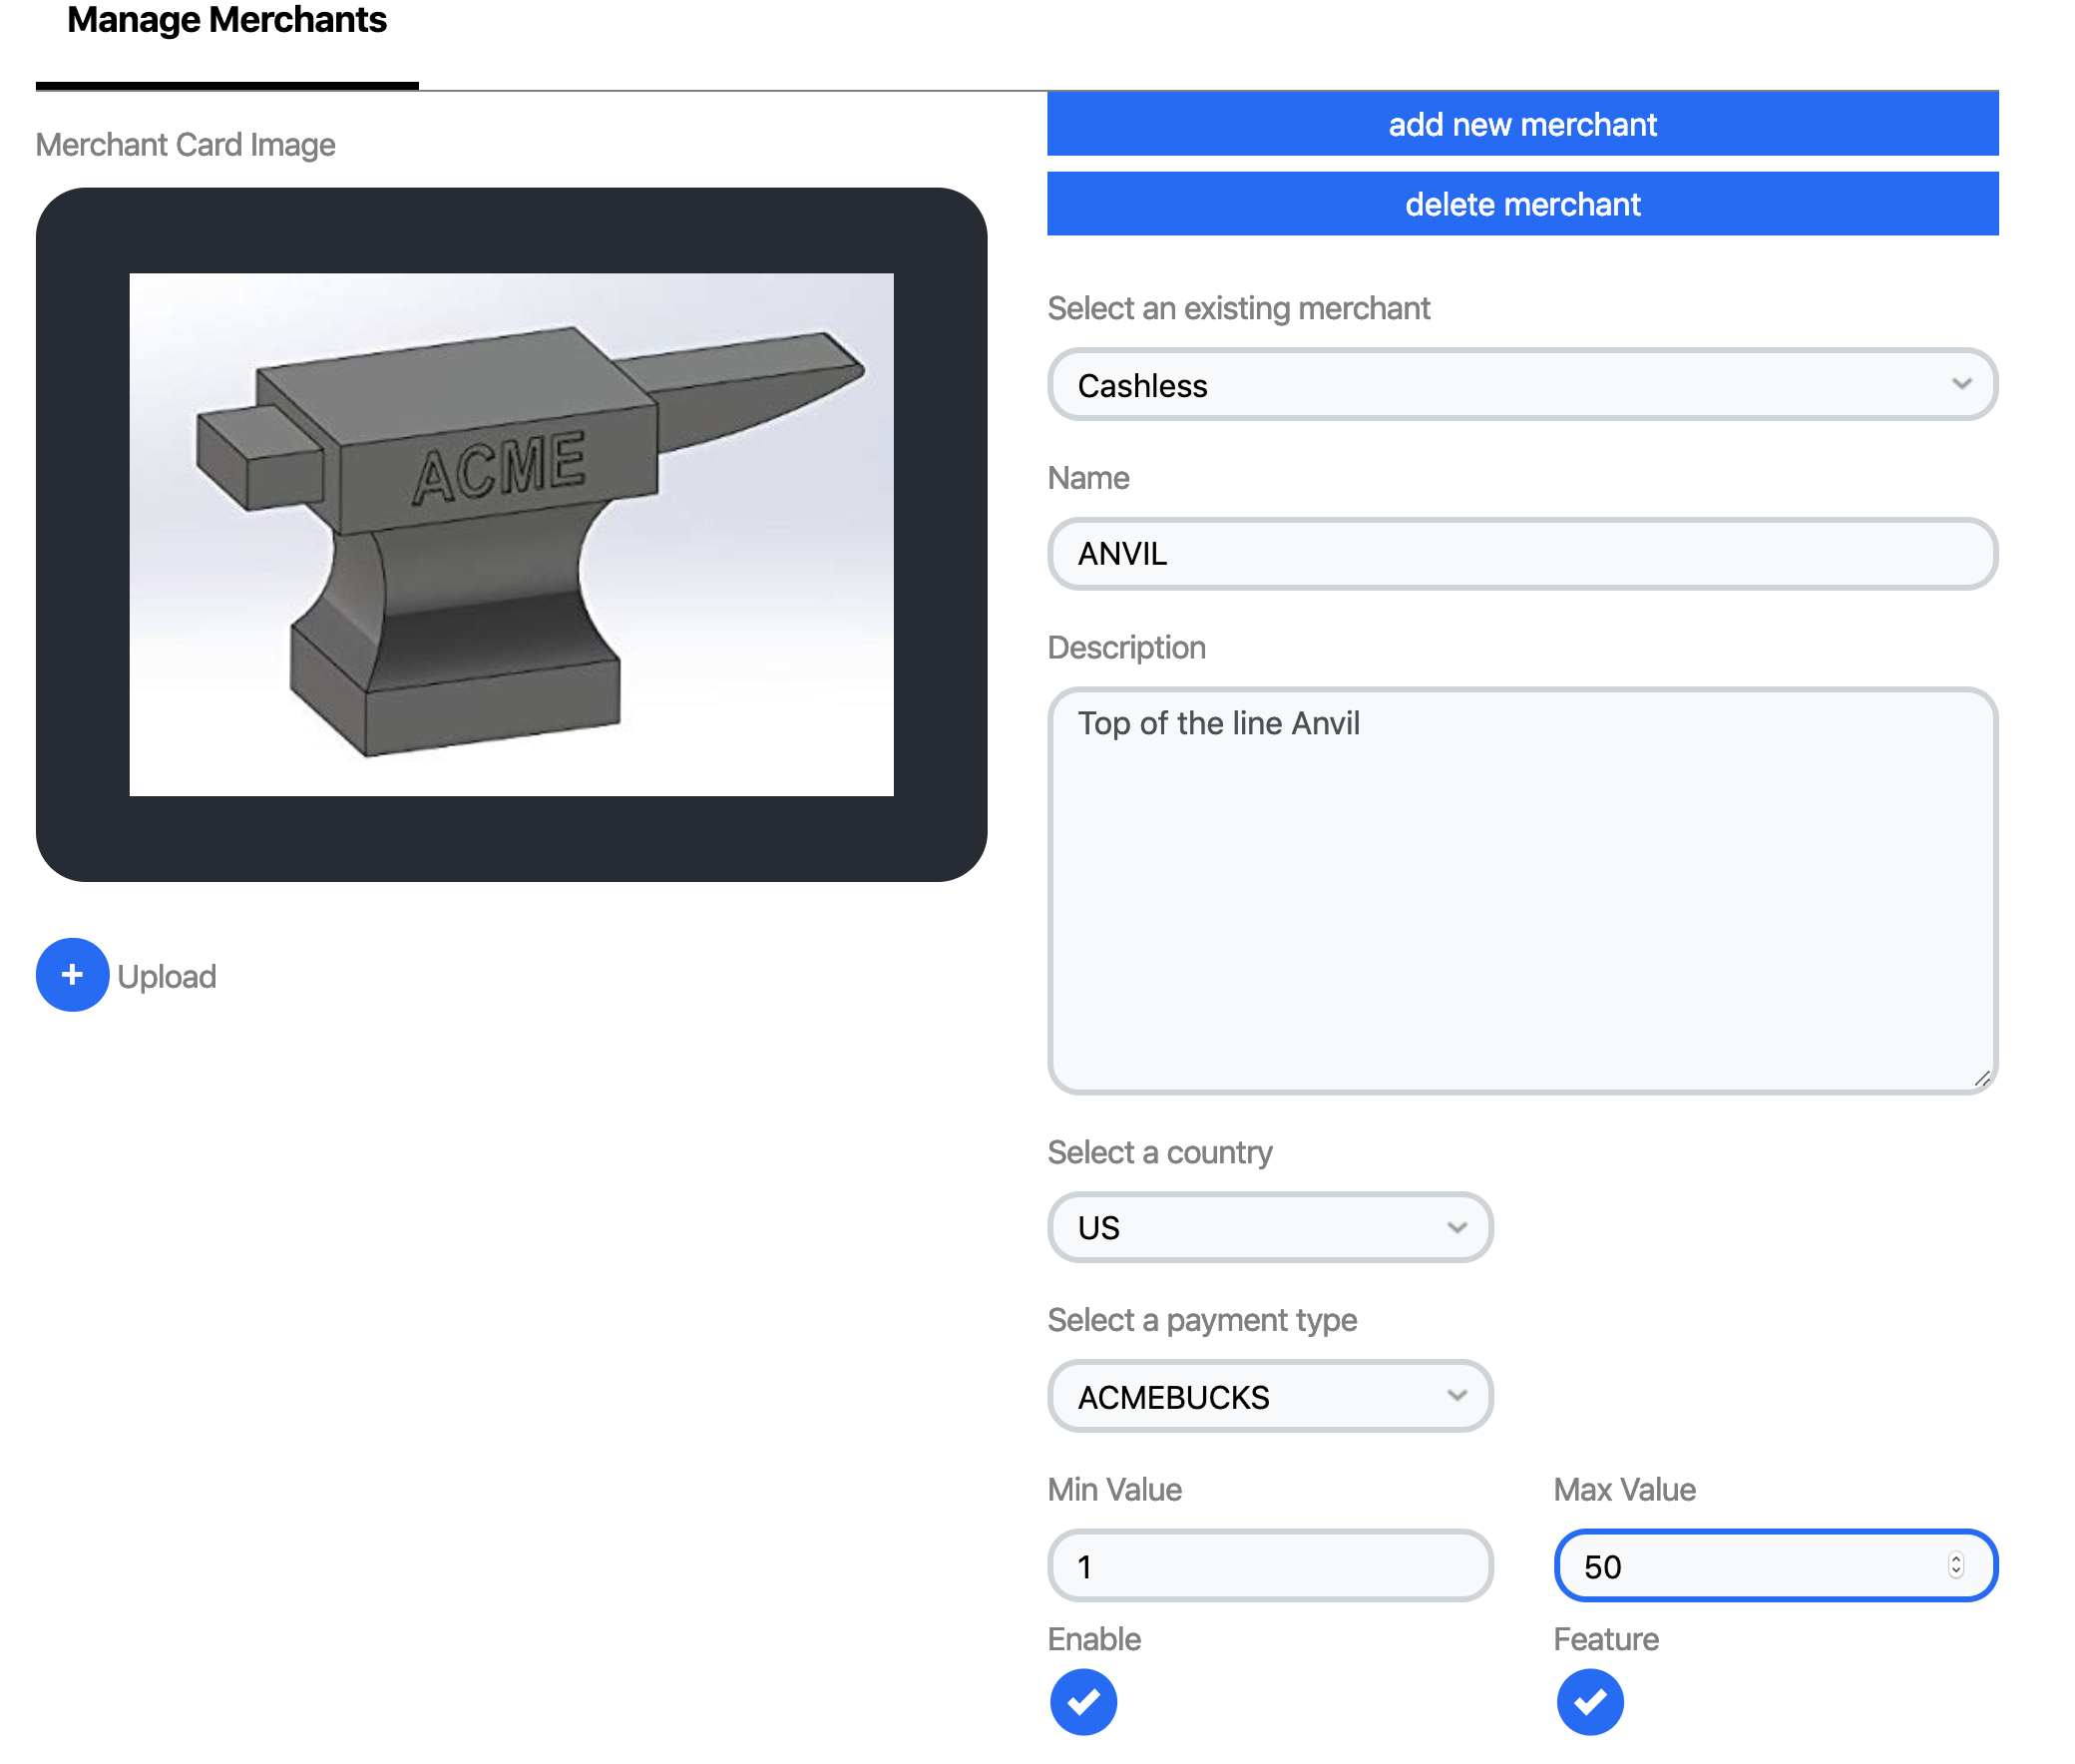
Merchant / Product Setup
If you would like to be able to have your users choose from a selection of products, or just display one, then fill in the details for how your payment product is presented here:
- go to https://beta.vouchrsdk.com/dashboard/applications/merchant
- select an existing merchant to modify it, or add a new merchant
- Fill in a name and description for the merchant/product. By default this information will be user facing
- Select a country it will appear in if the products are queried by country
- Select the payment destination type you defined above
- Select a minimum and maximum dollar value associated with the product
- Choose ‘Enable’ to allow your users to send a gift with the product
- Select ‘Feature’ to present the product in a list to your user when they’re choosing their payment type