Using a Custom Create Screen
The default create screen is extremely customizable allowing you to swap assets, colors, and some functionality.
If that’s not enough you can create your own.
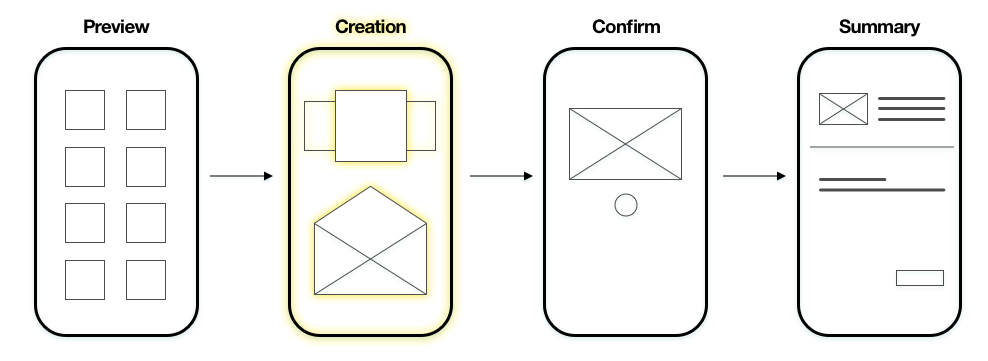
The goal of the create screen is to modify a PendingVoucher and then send it forward in the flow.
Step 1: Extend BaseVoucherCreationFragment
The create screen must extend the BaseVoucherCreationFragment which does much of the heavy lifting when interacting with the rest of the create flow.
It requires that you implement one method.
onPendingVoucherChanged is called whenever there’s changes to the PendingVoucher.
Generally PersonalizationOptions are used to change the voucher, when that happens this method will be called.
public class SimpleCreateFragment extends BaseVoucherCreationFragment {

    @Override
    public void onPendingVoucherChanged(PendingVoucher pendingVoucher) {

    }
}
class SimpleCreateFragment : BaseVoucherCreationFragment() {

    override fun onPendingVoucherChanged(pendingVoucher: PendingVoucher) {

    }
}
Protected Methods
The fragment has access to the following methods:
// Allows quick access of the create configuration and all it's settings.
CreateConfiguration getCreateConfig()

// The current pending voucher being modified
PendingVoucher getPendingVoucher()

// Used to navigate forward in the create flow and/or preview the gift.
CreateScreenContract.Navigator getNavigator()

// Returns the current set of PersonalizationOptions that are to be used to add/remove/modify elements in a PendingVoucher.
public List<PersonalizationOption> getPersonalizationOptions()
// Allows quick access of the create configuration and all it's settings.
fun getCreateConfig() : CreateConfiguration

// The current pending voucher being modified
fun getPendingVoucher() : PendingVoucher

// Used to navigate forward in the create flow and/or preview the gift.
fun getNavigator() : CreateScreenContract.Navigator

// Returns the current set of PersonalizationOptions that are to be used to add/remove/modify elements in a PendingVoucher.
fun getPersonalizationOptions() : List<PersonalizationOption>
Using the Navigator
When you want to move forward in the flow:
getNavigator().moveToLoading(getActivity(), getPendingVoucher());
navigator.moveToLoading(activity, pendingVoucher)
If you want to preview the gift:
getNavigator().previewGift(getActivity(), getPendingVoucher());
navigator.previewGift(activity, pendingVoucher)
Using the PersonalizationOptions
To edit the PendingVoucher generally you use the Personalization Options which you can grab by calling
getPersonalizationOptions()
Add or modify
option.addOrModifyItem(@Nullable Long mediaId) will launch the add flow for that personalization.
If you are modifying a personalization where multiple are possible (eg. Images) then you must pass in a mediaId to identify the item you want to modify.
Remove
option.removeItem(@Nullable Long mediaId) will remove that personalization.
If there are multiple of that type (eg. images) then you must pass in a mediaId to identify the item that you want to remove.
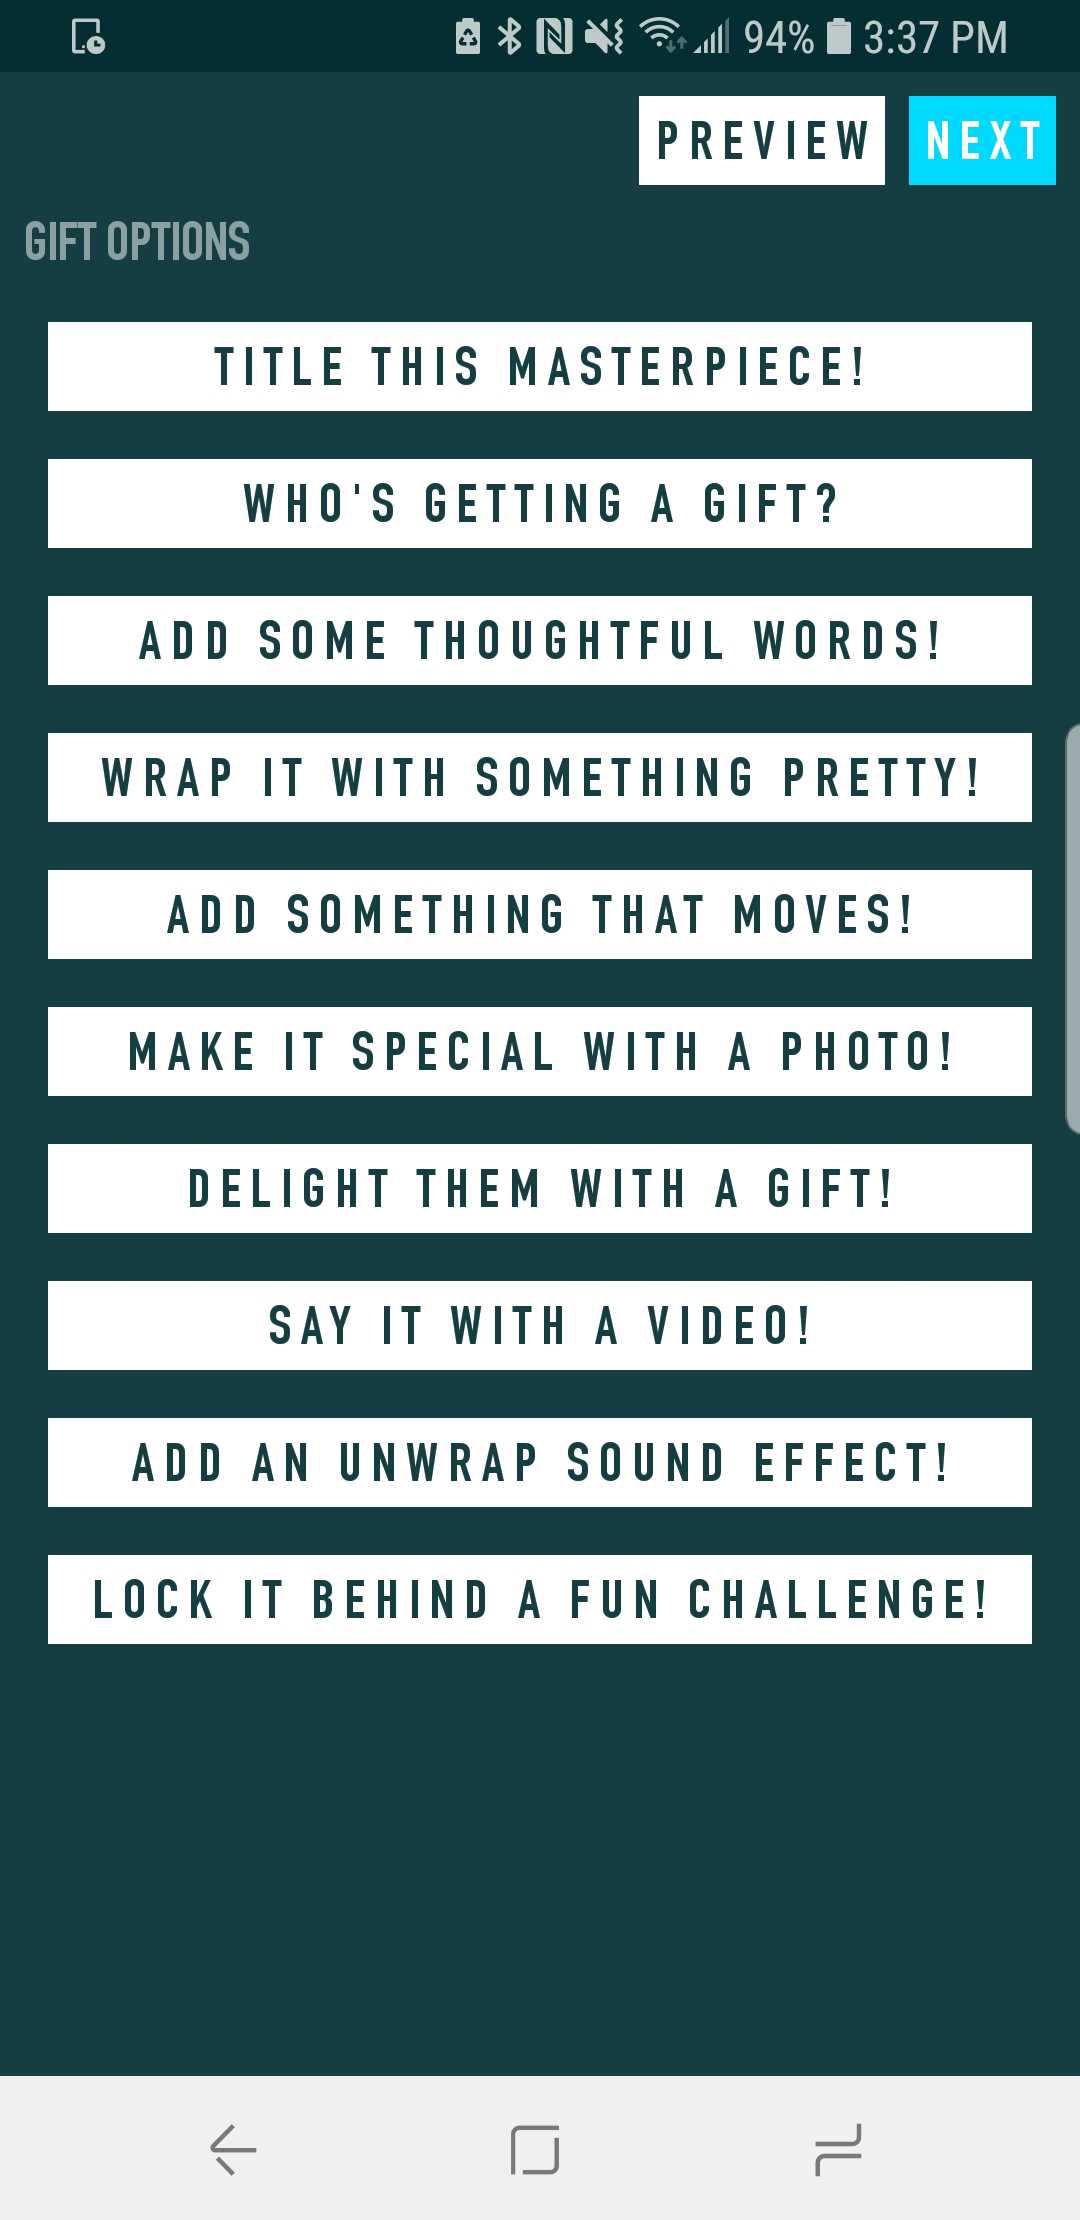
Simple Example
Here is a simple example of buttons that each will launch the PersonalizationOptions in order to add the personalization.
// Display all the options
for (final PersonalizationOption option : getPersonalizationOptions()) {
    VouchrButton button = new VouchrButton(getContext());
    button.setText(option.getTitle());
    button.setOnClickListener(new View.OnClickListener() {
        @Override
        public void onClick(View v) {
            option.addOrModifyItem(null);
        }
    });
    ViewGroup.MarginLayoutParams params = new ViewGroup.MarginLayoutParams(MATCH_PARENT, WRAP_CONTENT);
    params.setMargins(Util.dpToPixel(8), Util.dpToPixel(8), Util.dpToPixel(8), Util.dpToPixel(8));
    optionsLayout.addView(button, params);
}
for (option in getPersonalizationOptions()) {
    val button = VouchrButton(context)
    button.setText(option.title)
    button.setOnClickListener {
        option.addOrModifyItem(null)
    }
    val params = ViewGroup.MarginLayoutParams(MATCH_PARENT, WRAP_CONTENT)
    params.setMargins(Util.dpToPixel(8), Util.dpToPixel(8), Util.dpToPixel(8), Util.dpToPixel(8))
    optionsLayout.addView(button, params)
}
Full Example
SimpleCreateFragment.java
public class SimpleCreateFragment extends BaseVoucherCreationFragment {

    private VouchrButton nextButton;
    private VouchrButton previewButton;
    private LinearLayout optionsLayout;

    @Override
    public View onCreateView(LayoutInflater inflater, ViewGroup container, Bundle savedInstanceState) {
        View view = inflater.inflate(R.layout.simple_voucher_create, container, false);
        nextButton = view.findViewById(R.id.nextButton);
        previewButton = view.findViewById(R.id.previewButton);
        optionsLayout = view.findViewById(R.id.optionsLayout);
        return view;
    }

    @Override
    public void onViewCreated(@NonNull View view, @Nullable Bundle savedInstanceState) {
        super.onViewCreated(view, savedInstanceState);

        // The next button will move forward in the flow
        nextButton.setOnClickListener(new View.OnClickListener() {
            @Override
            public void onClick(View v) {
                getNavigator().moveToLoading(getActivity(), getPendingVoucher());
            }
        });

        // The preview button will launch the preview screen
        // to show what the voucher will look like for the claimer.
        previewButton.setOnClickListener(new View.OnClickListener() {
            @Override
            public void onClick(View v) {
                getNavigator().previewGift(getActivity(), getPendingVoucher());
            }
        });

        // Display all the options
        for (final PersonalizationOption option : getPersonalizationOptions()) {
            VouchrButton button = new VouchrButton(getContext());
            button.setText(option.getTitle());
            button.setOnClickListener(new View.OnClickListener() {
                @Override
                public void onClick(View v) {
                    option.addOrModifyItem(null);
                }
            });
            ViewGroup.MarginLayoutParams params =
                    new ViewGroup.MarginLayoutParams(MATCH_PARENT, WRAP_CONTENT);
            int margin = Util.dpToPixel(8);
            params.setMargins(margin, margin, margin, margin);
            optionsLayout.addView(button, params);
        }

    }

    @Override
    public void onPendingVoucherChanged(PendingVoucher pendingVoucher) {
    }

}
class SimpleCreateFragment : BaseVoucherCreationFragment() {

    override fun onCreateView(inflater: LayoutInflater, container: ViewGroup?, savedInstanceState: Bundle?): View? {
        return inflater.inflate(R.layout.simple_voucher_create, container, false)
    }

    override fun onViewCreated(view: View, savedInstanceState: Bundle?) {
        super.onViewCreated(view, savedInstanceState)

        // The next button will move forward in the flow
        nextButton.setOnClickListener {
            navigator.moveToLoading(activity, pendingVoucher)
        }

        // The preview button will launch the preview screen
        // to show what the voucher will look like for the claimer.
        previewButton.setOnClickListener {
            navigator.previewGift(activity, pendingVoucher)
        }

        // Display all the options
        for (option in personalizationOptions) {
            val button = VouchrButton(context)
            button.setText(option.title)
            button.setOnClickListener { option.addOrModifyItem(null) }
            val params = ViewGroup.MarginLayoutParams(ViewGroup.LayoutParams.MATCH_PARENT, ViewGroup.LayoutParams.WRAP_CONTENT)
            val margin = Util.dpToPixel(8)
            params.setMargins(margin, margin, margin, margin)
            optionsLayout.addView(button, params)
        }
    }
    override fun onPendingVoucherChanged(pendingVoucher: PendingVoucher) {
    }

}
simple_voucher_create.xml
<?xml version="1.0" encoding="utf-8"?>
<android.support.constraint.ConstraintLayout
    xmlns:android="http://schemas.android.com/apk/res/android"
    xmlns:app="http://schemas.android.com/apk/res-auto"
    android:layout_width="match_parent"
    android:layout_height="match_parent">

    <TextView
        android:id="@+id/giftContentsText"
        android:layout_width="wrap_content"
        android:layout_height="wrap_content"
        android:layout_margin="8dp"
        android:text="Gift Options"
        android:textAppearance="?TextAppearance.SecondaryHeader"
        app:layout_constraintTop_toBottomOf="@+id/previewButton"
        app:layout_constraintStart_toStartOf="parent" />

    <LinearLayout
        android:id="@+id/optionsLayout"
        android:layout_width="0dp"
        android:layout_height="0dp"
        android:layout_margin="8dp"
        android:orientation="vertical"
        app:layout_constraintBottom_toBottomOf="parent"
        app:layout_constraintEnd_toEndOf="parent"
        app:layout_constraintStart_toStartOf="parent"
        app:layout_constraintTop_toBottomOf="@id/giftContentsText" />

    <com.surpriise.vouchrcommon.ui.components.VouchrButton
        android:id="@+id/nextButton"
        style="?VouchrButton.Light.Positive"
        android:layout_width="wrap_content"
        android:layout_height="wrap_content"
        android:layout_margin="8dp"
        android:paddingLeft="@dimen/default_margin"
        android:paddingTop="@dimen/default_half_margin"
        android:paddingRight="@dimen/default_margin"
        android:paddingBottom="@dimen/default_half_margin"
        android:text="@string/next"
        app:layout_constraintEnd_toEndOf="parent"
        app:layout_constraintTop_toTopOf="parent" />

    <com.surpriise.vouchrcommon.ui.components.VouchrButton
        android:id="@+id/previewButton"
        style="?VouchrButton.Light.Neutral"
        android:layout_width="wrap_content"
        android:layout_height="wrap_content"
        android:layout_marginTop="8dp"
        android:paddingLeft="@dimen/default_margin"
        android:paddingTop="@dimen/default_half_margin"
        android:paddingRight="@dimen/default_margin"
        android:paddingBottom="@dimen/default_half_margin"
        android:text="@string/preview"
        app:layout_constraintEnd_toStartOf="@id/nextButton"
        app:layout_constraintTop_toTopOf="parent" />

</android.support.constraint.ConstraintLayout>
Step 2: Set CreateFlowController
Setup the CreateFlowController while building the CreateConfiguration.
When you setup the CreateFlowController override the createScreen function and pass in your own screen that we built in step 1.
CreateConfiguration createConfiguration = new CreateConfiguration.Builder(context)
        .setCreateFlowController(new CreateFlowController.Default() {
            @Override
            public BaseVoucherCreationFragment createScreen(PendingVoucher pv, CreateConfiguration cc) {
                return new SimpleCreateFragment();
            }
        })
        .build();

Engine.Builder engineBuilder = new Engine.Builder(VOUCHR_BASE_URL, SDK_ID);
engineBuilder.setCreateConfig(new CreateConfiguration.Builder(this).build());
engineBuilder.build().startup(this);
val createConfiguration = CreateConfiguration.Builder(context)
        .setCreateFlowController(object : CreateFlowController.Default() {
            override fun createScreen(PendingVoucher pv, CreateConfiguration cc) : BaseVoucherCreationFragment {
                return SimpleCreateFragment()
            }
        })
        .build()

val engineBuilder = Engine.Builder(VOUCHR_BASE_URL, SDK_ID)
engineBuilder.setCreateConfig(CreateConfiguration.Builder(this).build())
engineBuilder.build().startup(this)
More information on the CreateFlowController can be found in the JavaDocs here
Step 3: Launching the create flow
To start the create flow use the following IntentBuilder.
VoucherCreationActivity.IntentBuilder.init().start(this);
VoucherCreationActivity.IntentBuilder.init().start(this)
And depending on your theme you should see something like this